So, the weekend marked the 10th Conquest run by Comics Compulsion and the Christchurch Cavaliers.
As previously mentioned, it was a 1600 point Mid War competition, based around the anniversary of the battle of El Alamein.
I was running an Australian Rifle company, based around what I knew about the 9th Australian Division from a memoir of a digger that I had read recently. Basically it was a lot of infantry, with mortars, 25pdrs, 6pdrs, Carriers and a detachment from the Australian Divisional Cavalry in Stuart light tanks.
So with the mass of speed painting done on the nights prior to the tournament, it was time to get started! Like Craig, I have neglected to take photos- I forgot!
Game 1 was against Chris W, who was running Pioneers with Marders. Lots of Marders.
The mission was No Retreat, and it was a night attack. Representing the first rush to claim high ground at the start of Alamein, the Australians sought to attack the German positions under the cover of night.
Being pioneers meant that there was a whole lot of Barbed wire on the table. A whole lot!
So with the left flank totally locked down by three lengths of barbed wire, I was forced to attack wholly up the right flank. Turn one, I advanced as silently as I could, not firing to keep my positions hidden.
The Germans however had no such compulsion, opening up with all of their firepower. A platoon of Carri appeared out of the darkness on the top of the nearby high point, opening up with their multiple machineguns. The pioneer infantry added to the fusillade, obliterating the First Platoon, causing the survivors to rout (fearless, yay)
With no other tactical choices, the australian advance continued, pushing towards the high ground on the hill. The enemy Italians were seen off by a combination of 6pdr Portee and 25pdr fire.
But it was the infantry who would have to win the day, they continued to push forward. But the Germans once again opened up with all of their machineguns, crippling 2nd platoon and it took the urgings of the Company Commander to get them to remain in position on the battlefield.
It was now the turn of the Germans to continue firing, the arrival of the Marders heralded a further annihilation of the next platoon of infantry as they advanced forward. The 6pdr portees were quickly annihilated, being eradicated by the 76.2mm cannon from the Marders.
The Australians continued to push forward, but with no anti-tank assets left, all that remained was to attempt to destroy the marders with 25pdrs indirect fire. One Marder was even destroyed by a 3" Mortar!
But that was all that the Australians could claim, the infantry were slowly wasted away, as were the support assets such as the Stuarts and Carriers. All in all, a very tough game. Chris decided to hit, with everything in Turn One and Two- I lost two full platoons of infantry when they should have had concealment from night. Coming back from that would simply be impossible.
A 5-2 Loss.
Game Two was against Jim, who was running a super cool Panzergrenadier company with Dianas!
Jim had to attack me in a Cauldron, so I deployed two platoons of auzzies, 25pdrs and the Portees in ambush. My plan? Use the Portees to harass any armour and hope that the Auzzies could hold on!
Jim foiled my plan of using Portees to kill tanks by not deploying any. So, simply I zipped my Portees out to begin machinegunning his mortars! But, with the new Mortar rules, the Germans were able to quickly eliminate no less than 3 of the Portees in short order, ruining their fun entirely. The remaining 6pdr deployed itself in a wadi and sat threatening any tanks which might come its way.
Jim pushed a big infantry attack through some rocky ground, under the covering fire of some infantry guns and mortars. The Auzzies held firm, using their 2pdr bombardments to destroy first the enemy AT guns, then proceeding to rain shells down onto the infantry.
But this was changed when the Australian reinforcements arrived, the Stuarts moved on and immediatly assaulted Jim's infantry reserve. With no AT guns to protect them, they were quickly forced down to half strength and forced out of their positions. The Stuarts continued to harass the infantry and support weapons, eventually able to destroy the mortars and infantry.
Jims infantry assault had stalled by bren gun fire, and once the enemy was pinned and under pressure, it was time for the Australians to counter charge with cold steel.
Jim threw a last attack to gain a point with an attack of 2 heavy armoured cars, but both were destroyed with Sticky Bombs.
A 6-1 Win to the Auzzies
Game Three was against Rob Shirley, in a Dust Up.
Rob was running his traditional German Grey panzers, with captured 25pdrs, Panzer IV longs, Panzer II's and all led by that chap Rettermeier.
The plan was simple attack hard and fast with 2 platoons of Australian Infantry, hope the 25pdrs could kill a couple of Panzers with indirect fire and hope that the 6pdr portees could kill the tanks to allow the infantry assault to continue.
How did it go?
Well. Very well. The infantry raced into the buildings, opening fire onto the enemy positions. But it was the 6pdr portees who placed themselves in such a way to have their shots onto the enemy tanks. Quickly the Panzers started to burn. But it was when the Infantry started to reach the tanks that the Panzers started being in trouble. All it took was a couple of sticky bombs to destroy Rettermeier, to destroy the Panzer IV platoon and once a couple of Panzer IIs had been knocked out by 25pdrs, it was a large infantry assault that destroyed the enemy panzers.
A flank attack by two Enemy panzers was quickly seen off by direct fire from 25pdrs, whereas the Auzzie flank attack cost the Germans dearly, destroying 25pdrs and preparing them for a last ditch infantry assault by the Australians. Another infantry assault went in on the 3 SP AA guns of the Germans, one having been killed by MG fire.
Once they were seen off, the Australians have total control over the battlefield. In fact, the Australians had both objectives, as well as Rob only having a single Observer stand left on the battlefield.
A 6-1 Win to the Australians.
So, day One had gone alright, two good wins, but one loss. The Allies had gained the momentum, and were pushing hard at the Germans ready for Day Two.
Game Four was against Dave D, in a Pincer.
With the initiative with the British, it was time for another attack. The mission was Pincer, with the Australians attacking at night.
This game was silly.
It started at night, with the Australians advancing under the cover of night with three platoons of infantry massed in the centre to attack the forward objective. Here was when the game could have been over quickly, Dave had 6 shots to hold back my infantry assaults, and had succeeded in not one, but 3 pins!
So with the infantry stalled, the Germans were able to smash the infantry with artillery, MG and tank fire. Here was Dave's first chance to win the game, two platoons of Australian infantry simply dissolved in the ensuing firefight and assault. But, Dave's infantry disappeared too. Which left the job of capturing the forward objectives to his Panzers.
While the infantry assault went on, the 6pdr portees positioned themselves to destroy the 2iC tank, while the Stuarts put a 37mm shot straight through the centre of Rettermeier's turret, destroying it.
The Universal Carrier platoon positioned themselves to assault the enemy 25pdrs, losing one of their number to defensive fire, but managing to destroy the two guns! They then moved to assault the staff team, killing it and breaking the platoon.
But the German reserves had arrived, the Panzers began to swarm over the Stuarts and Universal Carriers, destroying the Stuarts and leaving one carrier hiding from the combined firepower. A platoon of tanks attempting to push the Aussie infantry off the objective was seen off by 6pdr portees, 25pdrs and sticky bomb equipped infantry.
The game ended when Dave's last attack, a flanking mission by 3 Armoured Cars was seen off by defensive fire by Rifles, with their loss, his company broke.
A 4-3 win, which could have so easily been a 6-1 either way earlier on.
Onto Game Five, and there was only one person who I could be playing. Craig C, and it was the Australians attacking the Germans at night, in a Fighting Withdrawl.
My plan was to advance as fast as possible, closing the gap to Craig's position with as much haste as possible, to assault and destroy the enemy position before he could react.
It was a nice plan, but it didn't quite go to plan!
I managed to push forward with all haste, one platoon even riding carriers! But once they reached the German front line, Craig's ambush appeared, to defend his guns. Night held, which kept my infantry from being totally obliterated.
The 25pdrs began to find their range, pouring down punishing fire onto the head of the German position, destroying guns and infantry alike with their shells. With the enemy positions thinned out, it time for another infantry assault, which pushed the Germans off the objective and put it in the fragile Australian hands.
On the other flank, the Australian 6pdrs were under fire from Marders. But, with no loss to themselves they were able to hit and destroy 2 Marder, and bail another. The platoon then failed it's morale.
The German defense now hinged upon the Italian Assault Guns, who put themselves into the wadi to protect the objective. But once the 25pdrs found their range, the 6pdrs began their fire also, and finally an infantry assault by the 2 remaining Australian infantry teams was able to destroy the Italians utterly, leaving the Australians on the objective, and in charge of the game!
A 4-3 win, well fought and hard earned!
So, 5 games played, 4 wins, one loss. So after a bad start, the Australians were able to pull it back and even when attacking tanks, they were able to come out on top!
My points were enough for 3rd place, just the one point behind Craig!
Another enjoyable weekend gaming, it was fun to run Australians. Now I need to paint some 2 pdrs for them, so I can take them to Valleycon next year!
CP
Thursday, 25 October 2012
Saturday, 20 October 2012
Conquest 2012- All good to go!
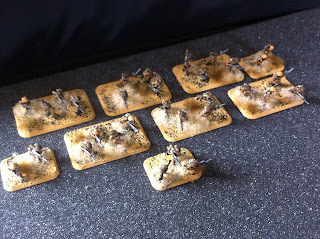
On Thursday night I was able to finish off the basing on my Australians, so they are all good to go!
I have had these Australians since For King and Country came out a very long time ago. That was the real reason to get these guys painted, to start actually trying to clear out the stuff in my cupboards!
So a lot of infantry in Slouch Hats. Now, this is a bit ahistoric, the Australians are no idiots, so when they went in to combat they were ALL sure to put on a tin hat, despite their pride in their slouch hat, they knew that a helmet might just save their lives.
But they look cool, so here they are!
 The Completed Army, ready to go!
 First Rifle Platoon
 Second Rifle Platoon
 Third Rifle Platoon
 Mortar Platoon
 Carrier Patrol
 25pdr Battery (From my Valleycon Army this year)
 A platoon of Divisional Cavalry Stuarts. The Australian Div Cav had a whopping 3 Stuarts, the rest were Crusaders II by this point. Prior to that they had captured Italian tanks and Bren Gun carriers!
 The Stuart Platoon Commander, showing off his slouch hat
 The 6pdr platoon dismounted
 The 6pdr platoon mounted up on their portee trucks
 Company CO and 2iC. The miniature is the Charles Upham model, I figured a commander throwing grenades would put me in the right frame of mind for what I wanted him to do!
 Destroyed Valentine objective. Last seen as part of my Valleycon army...
 A knocked out Crusader objective
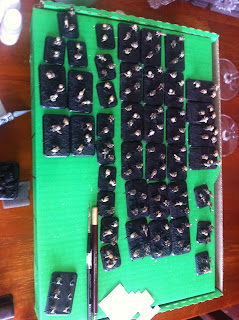
So that is my Auzzies. But, the Tournament Organiser had a problem last week, that there were not enough allied players. So an allied army had to be found! I sortof remembered that I had a Light Tank Company lurking in a box somewhere, and figuring it would be in good nick, thought I could lend it out. When I found the box on Wednesday night, they were not in good shape at all.
So two frantic nights painting, and this is the result, ANOTHER 1600 point army!

Lots of Stuarts, some Grants and Shermans, a Motor Platoon and Limited Hurricanes. Fast, Direct and to the point!
 A close up on a Grant
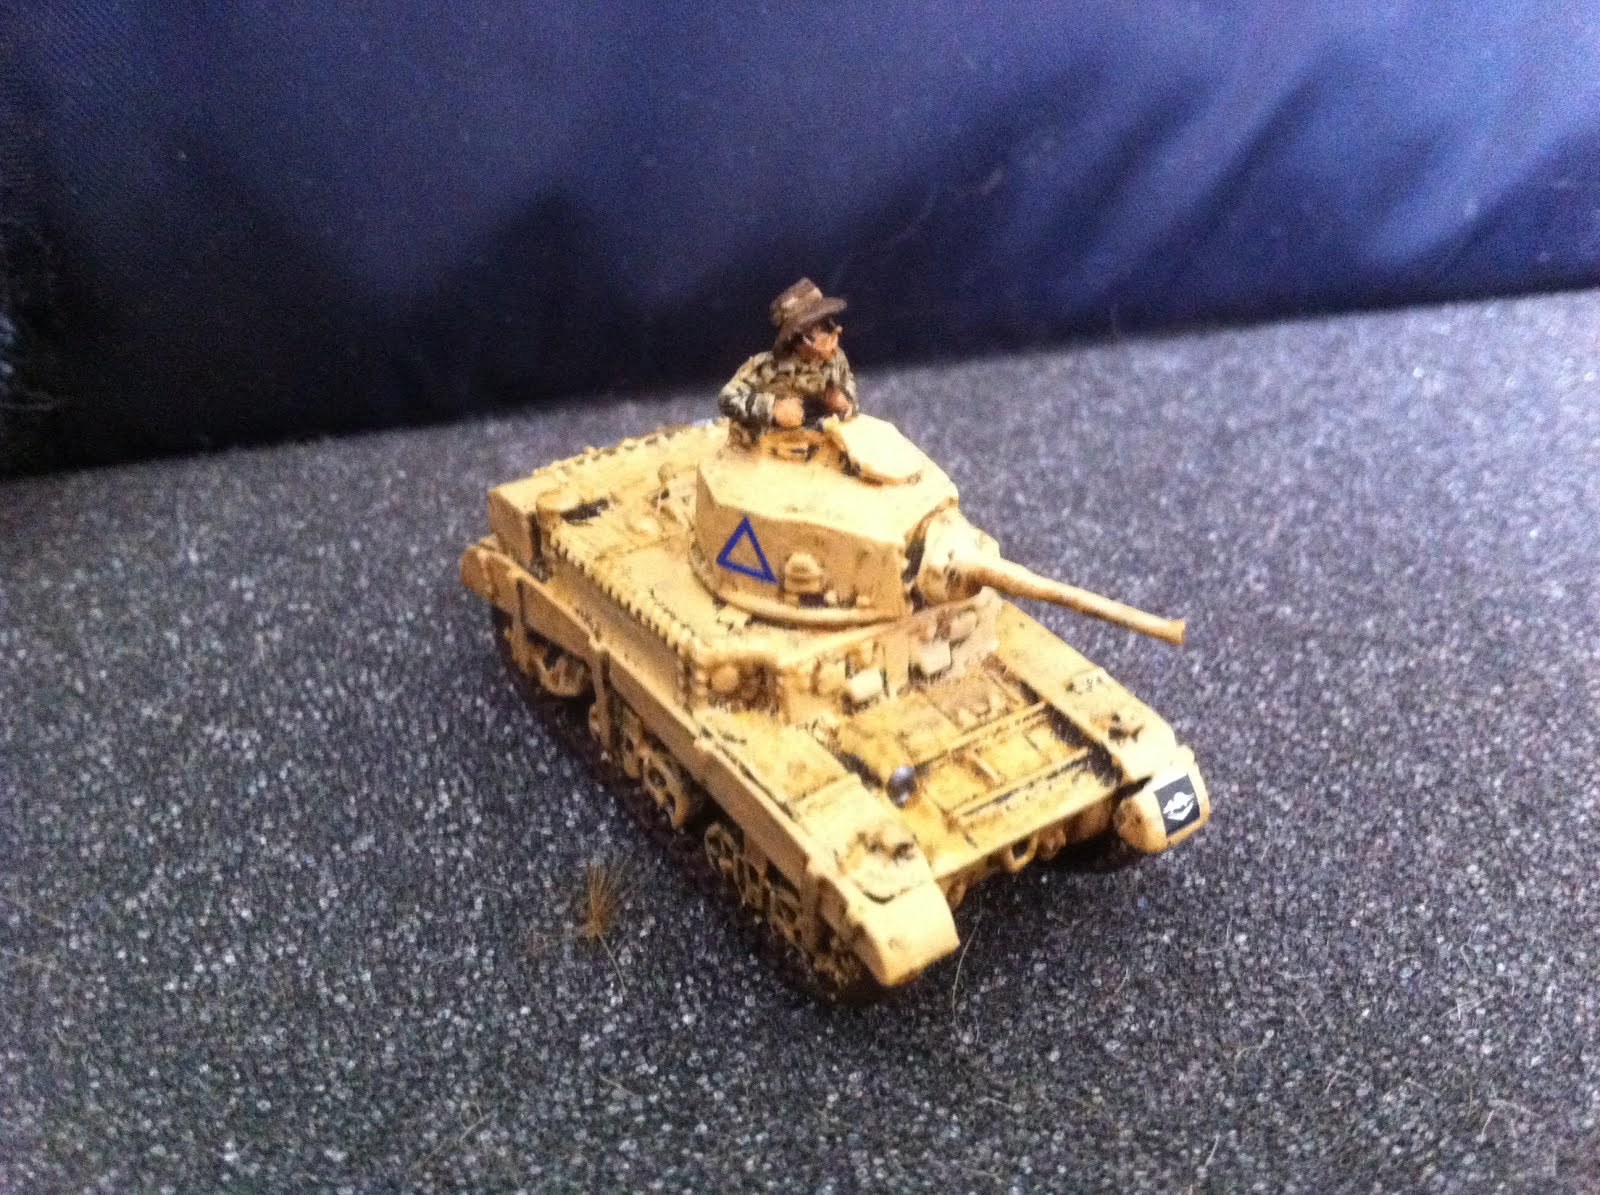
 A close up on the Company Commander Stuart, showing off his national pride! Or making sure he doesn't get strafed by the Hurricanes...
 Now I managed to find something while I was searching for the Stuarts. So let's compare. Above, is an Australian Platoon Commander, painted in 2012. Not my finest work, but still pretty reasonable I think.
Below is one of my Rifle teams from my Conquest army in 2002. Notice a difference?
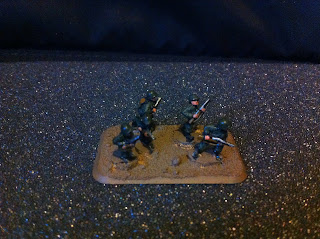
Bit of a change isn't it?

Oh, and I had a game of Dystopian Wars last night with Jason too- was super fun. I had forgotten how much I enjoyed Dystopian Wars, and last nights game culminated in pretty much EVERYTHING being boarded and prized! All large ships were prizes, and there were only 3 Mediums left which had any marines left!
Off to Conquest now,
Auzzie Auzzie Auzzie!
CP
I have had these Australians since For King and Country came out a very long time ago. That was the real reason to get these guys painted, to start actually trying to clear out the stuff in my cupboards!
So a lot of infantry in Slouch Hats. Now, this is a bit ahistoric, the Australians are no idiots, so when they went in to combat they were ALL sure to put on a tin hat, despite their pride in their slouch hat, they knew that a helmet might just save their lives.
But they look cool, so here they are!


So that is my Auzzies. But, the Tournament Organiser had a problem last week, that there were not enough allied players. So an allied army had to be found! I sortof remembered that I had a Light Tank Company lurking in a box somewhere, and figuring it would be in good nick, thought I could lend it out. When I found the box on Wednesday night, they were not in good shape at all.
So two frantic nights painting, and this is the result, ANOTHER 1600 point army!

Lots of Stuarts, some Grants and Shermans, a Motor Platoon and Limited Hurricanes. Fast, Direct and to the point!


Below is one of my Rifle teams from my Conquest army in 2002. Notice a difference?

Bit of a change isn't it?

Oh, and I had a game of Dystopian Wars last night with Jason too- was super fun. I had forgotten how much I enjoyed Dystopian Wars, and last nights game culminated in pretty much EVERYTHING being boarded and prized! All large ships were prizes, and there were only 3 Mediums left which had any marines left!
Off to Conquest now,
Auzzie Auzzie Auzzie!
CP
Wednesday, 17 October 2012
15mm Vietnam Reinforcements
So along with painting a horde of Australian infantry, I was tinkering away with some 15mm Vietnam US stuff too.
 Just a few transports!
 2 M113 from Battlefront Miniatures. The 113 on the right has a couple of crew from Flashpoint miniatures- those two guys usually sit out of the door of a UH-1.
 2 M113 ACAV vehicles, both from Battlefront miniatures. With the addition of two M60 machine guns with gun shields, the ACAV (Armoured Cavalry Vehicle) was used in a scouting role, but for fire support- it is not bad at all! One has a Mark 19 Grenader Launcher rather than a 50 cal heavy machine gun.
 An M106 Mortar Carrier from Flashpoint Miniatures. I am not as keen on the Flashpoint miniatures as the Battlefront ones, the resin that they are made of didn't like paint adhering to it, even after I cleaned it twice. But, it's not all bad, it came out ok.
 A Flashpoint miniatures Lieutenant. When Flashpoint get miniatures right, they really get it right. Some of the miniatures I won't use, but I do love this Lieutenant, and his style with the 45!
 Another of the Flashpoint excellent miniatures, this one is a soldier carrying a wounded buddy out of trouble.
 Two "Kit Carson" local guides. There were some Vietnamese who served with the US forces as scouts, interpreters, translators or as ambush detectors! They had a reputation for "disappearing" when the bullets started flying, but as scouts they were useful (it seems)at detecting ambushes. They are armed with the earlier M14 rifle, rather than the more modern M-16 rifle.
So, more stuff painted, but they aren't auzzies. Positive is that it will give me time to get to painting Australians right? Right?

More painting needs to be done...
CP


So, more stuff painted, but they aren't auzzies. Positive is that it will give me time to get to painting Australians right? Right?

More painting needs to be done...
CP
Monday, 15 October 2012
Conquest 2002: A Look Back....
So, Conquest is fast approaching for 2012, and I have been manically painting Australian infantry for the competition. Am I done? No, but to make me feel better about myself, I am going to write a blog post and hide from the unfinished-ness.
This year's Conquest is markedly different to other years. Firstly, it is the 10th anniversary of the competition! 10 years ago, minus a week, a young impressionable youth wandered into the local gaming store in Christchurch, Comics Compulsion on a Friday night. Playing a game on a back table were two really nice guys, Tim D (the owner of said LGS) and Stephen H (local WW2 officionado). The two were playing a game, British against Germans, with some tiny looking tanks. Interest piqued, I stayed until the shop closed, rolling dice, moving tanks and playing what was my first historical wargame. Wouldn't have a clue who won, all I knew was that I was hooked!
So, the next day I went back with my mum (my bankroll!) and walked out again a couple of hours later with a large box of stuff- enough for a 1500 point US Armored Rifle Company in fact!
My list was... US Armoured Rifle Company
HQ- Bazooka, Jeep, M2 Halftrack
Armored Rifle Platoon- Full Strength
Armored Rifle Platoon- Full Strength
Tank Platoon- 3 M3 Lee Tanks
Tank Platoon- 3 M5A1 Stuart Tanks
Armoured Recon Platoon- 2 M3A1 Scout Cars, 2 Jeeps
Self-Propelled AT Platoon- 2 M10
Limited Air Support- A36 Apaches (1/72nd Scale Mustangs!)
So there it was, 6 platoons of awesomeness! Taken in those days from the Version One Rulebook, where all the lists were printed in a terribly illegible format.
I had two weeks to paint the army for the tournament. Now, I knew next to nothing about tanks in WW2. All I knew was the few stories I had read, so tank gun barrels were silver, and all the infantry were in classic OD.
I did manage to get them painted the night before, and turned up as a fresh faced kid at my first tournament. Handily it was around the corner from my parent's house too!
At the tournament, there were I think 8 games, 4 Free for All and 4 Hold the Line (where it was a straight roll off to see who would attack!).
I don't remember much of the games themselves. I remember using Craig's Sturmovik air support to kill his KV-1s, I remember assaulting Dale's Italian artillery with infantry, when he was attacking me in Hold the Line (and my style according to some hasn't changed).
I also remember winning the tournament. Now that sounds very much like bragging, and to me then, it was really important. I felt a great deal of pride to win! Looking back at it now, I feel embarrassed about how much it did mean to me. Which is why I can understand those players who do want to win at seemingly any cost. But, that just is not me anymore. I have won more than my fair share, as I have lost my fair share.
The main thing that I do remember, is the people I played against. At that tournament I met many people I am proud to still call friends, some people who I regularly share emails with, some who come to stay with me for local tournaments, others who return the favor for me when I travel.
So that is what Conquest means to me. It was where I began this journey into history, through wargaming. It is where I met some amazing people, shared some wonderful moments with them, and most importantly learned to laugh when all you can roll is a 1.
Oh, and I am still painting Auzzies...

Paint, paint, paint...
CP
Saturday, 13 October 2012
Royal Australian Armoured Corps Part Three- Foreign Tanks!
So, there were too many pictures for the last blog post (apparently that is possible), so I had to curtail a couple and leave them to make a 3rd post, this time with a few foreign tanks!
 The Hall of Russian Vehicles. I don't think it is actually called that, but I think it should be!
 A Type 69 II Battle tank. An uparmoured Chinese copy of the T-55, these are a frequent opponent of mine in 6mm! Plus, this one has the same camo scheme as the ones I fight!
 The underside of a T-72M looking as imposing as possible! Another of my frequent opponents in 6mm, was cool to see it close up! Pity the sun decided to not let me get good photos...
 An OT-64 APC. Of Czech design, these were widely exported to the middle east and other areas.
 The Type 59 MBT. Another Chinese copy, the Type 59 was very much outclassed by other western MBTs, but if they didn't have tanks, they could cause serious problems for infantrymen! Widely exported tank.
 Another Czech APC, this time an OT-62. Main difference to the OT-64? Tracks not wheels.
 Now, onto the Swedish! This is an S-Tank. Representing a totally different concept in tank design, the S-Tank has a very low silhouette, a powerful gun and very fine maneuverability to allow it to align itself to ambush the expected marauding Soviet Tanks. Similar in concept to the German StuG series, the S-Tank takes it to a whole new level of performance, armour and reliability.
Oh and it can do this..
Now, onto the Swedish! This is an S-Tank. Representing a totally different concept in tank design, the S-Tank has a very low silhouette, a powerful gun and very fine maneuverability to allow it to align itself to ambush the expected marauding Soviet Tanks. Similar in concept to the German StuG series, the S-Tank takes it to a whole new level of performance, armour and reliability.
Oh and it can do this..
 More shots of the S-Tank.
 More S-Tank!
Well, that is it, all my photos pretty much from the Armoured Corps Museum. Very very cool collection there, I was very impressed.
So what of my Australian painting?
Well...
More S-Tank!
Well, that is it, all my photos pretty much from the Armoured Corps Museum. Very very cool collection there, I was very impressed.
So what of my Australian painting?
Well...
 Painting continues...
CP
Painting continues...
CP


Friday, 12 October 2012
Royal Australian Armoured Corps Museum- Part Two
so, following on from yesterday's post about the Royal Australian Armoured Corps museum north of Melbourne, here is Part Two.
And this time, it is all about tanks...
 So, starting with a modified Caterpillar D7 Bulldozer. It has been modified to become a Beach Assault vehicle, designed to be able to land and complete various engineering tasks, such as recovering bogged down armoured vehicles.
 Next up is the LVT-4 equipped with a 75mm howitzer. The howitzer is in the same turret as an M8 Scott Assault Gun, these vehicles were used as fire support for infantry landings. Used by the Auzzies in their landings later in WW2, and also by the USMC.
 The LVT-4. Armed with multiple machine guns, these were used to ferry troops as part of amphibious landings. Used in the Pacific and in Europe, and known as the Buffalo and armoured in name only!
 Now if you wanted a bit more horsepower than a D7, you could always opt for a modified M3 Grant, modified into a Beach Armoured Recovery Vehicle (BARV).
 The first tank the Australians really got their hands on- the Vickers light tank. Armed with a 0.5" MG, and very little armour, these were quickly obsolete by the time the Australians acquired them. They started to replace them with captured Italian vehicles, before they could get more modern tanks from the British.
 AN M3 Scout Car. The predecessor in a way to the M2 and M3 Halftracks, the White Scout Car was used by all the Allied nations in WW2 pretty much. Put some MG's on it and you have a recce car, add some radios it can be a command vehicle, or just leave it as is and drive some commanders around.
 Next up the Staghound Armoured Car. These are a cool, cool vehicle! They are very large for an armoured car, relativly (to an armoured car) well armoured and equipped with a 37mm main gun. The Australians were equipped with them from 1946, but Kiwis, Canadians and British armoured car units had them and used them during World War II.
 More Staghound is more good.
 An M3 Stuart light tank. Known to the British as the "Honey" (because it is a honey to drive), the Stuart is very fast, owing to a large radial aircraft engine, and next to no armour! Lightly armed, these were recon units in the west, but were more effective as infantry support in the Pacific theatre.
 An M3 tank with Lee Turret. Armed with two weapons, a 37mm gun in the turret, and a 75mm in the hull, the Lee/Grant was a stopgap measure to get a higher powered gun (the 75mm) into the war fast, because the Sherman was not yet ready to go.
 This time, an M3 with a Grant Turret.
 And this time an M3 with a Grant Turret and a bulldozer blade.
 This is the Australian Sentinel tank, the only Australian designed and built tank ever. Never saw combat, but served as a crew training tank during the second world war.
 Another view of the Sentinel.
 A Cromwell Cruiser tank. Note how it still has it's loading instructions for it being shipped over to Australia painted on the side of the turret.
 On to Matilda II Infantry tanks now. This is a standard model Matilda II, with a 2pdr in the turret and an MG. These were used by the Australians in the Pacific War, and their heavy armour must have come as a shock to the Japanese!
 A Matilda Frog tank. Rather than a 2pdr in the turret, the Frog is equipped with a Flamethrower (for particularly resilient Japanese bunkers)
 The strange contraption on the rear of this Matilda is a "hedgehog" mortar battery- 7 tubes of Spigot mortars, for bunker busting! This variant never saw combat, the war ended before it could reach the front lines.
 This Matilda has been upgraded with a bulldozer blade on the front. Very useful in hostile terrain!
 And from the large, to the very small. A universal carrier. A vehicle of many, many roles, from recon to OP, to flamethrowers to airlandings, the universal carrier truly earns it's name! The auzzies even mounted 2pdrs on the top of them!
 The ultimate in British Infantry Tank design, the Churchill Crocodile. With massively heavy armour, a 75mm gun in the turret and a flamethrower fueled by a trailer trundling along behind it, the Crocodile was a weapon feared and hated by the Germans. Certainly both sides tragically had very little mercy for flamethrowers when captured.
 No tank collection would be complete without a Sherman M4. Ubiquitous, reliable and mass production at it's finest, the Sherman is an icon of the Allied victory in WW2.
 The M24 Chaffee was the replacement for the Stuart. Armed with a bigger gun, but equally as fast as the Stuart, the Chaffee saw service towards the end of WW2, and in Korea.
 Type 97 Te-Ke Tankette. Now this thing would have barely fitted me in it, let alone any other crew! The concept of Tankettes makes me feel claustrophobic, and I am not suprised that the design idea did not last long...
 The big Type 97 Chi-Ha Medium Tank. Practically dwarfing the tankette next to it, the Chi-Ha was not well thought of by the Allies. Outgunned by the Russians when it first appeared, it was woefully inadequate to engage any American or Australian armour in the Pacific. However, if there were no tanks nearby, the Chi-Ha was a perfectly suitable infantry support tank, being thought of as able to go through any terrain to appear behind the enemy, often catching defensive positions out by a sudden flank attack!
 An Australian Centurion Tank. By all counts, a pretty good tank. Certainly at the time they were well thought of, The Israelis used them to a good deal of success against the Syrians, whereas the Australians were using them against the Viet Minh, finding their Splintex (flechette) round very effective....
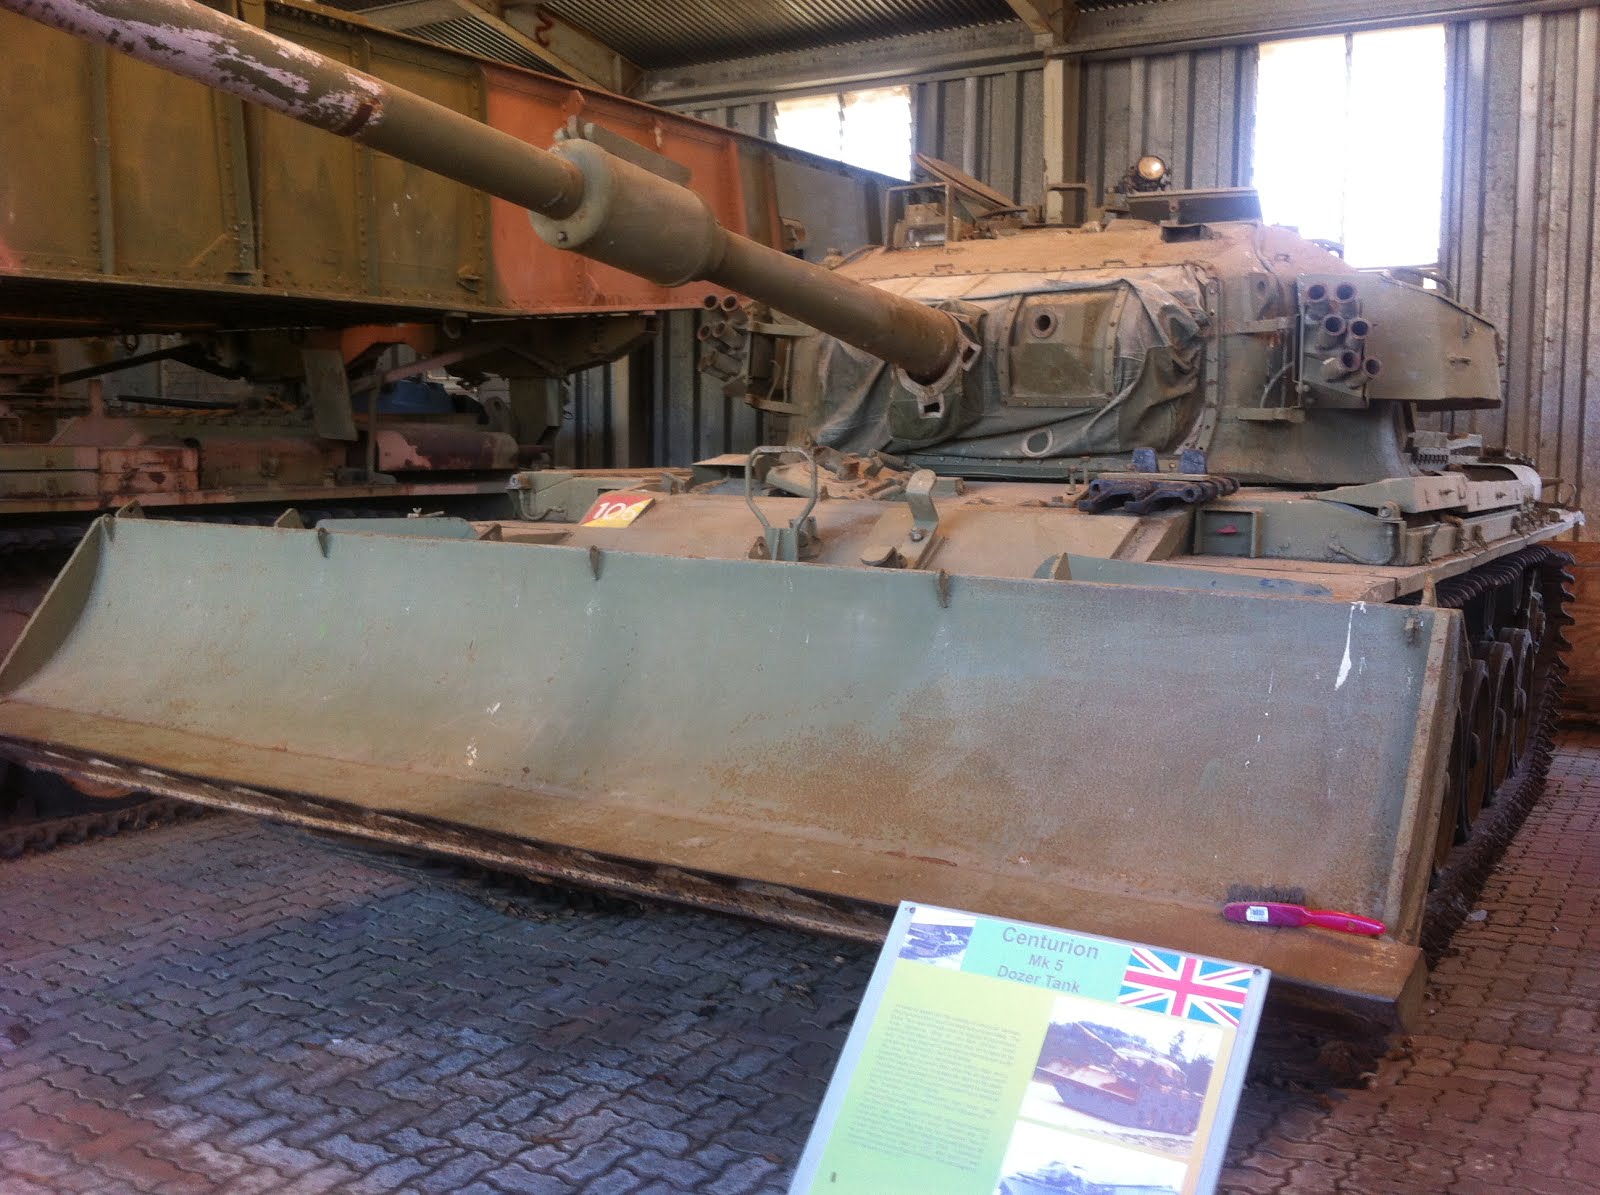
 The in the terrain of Vietnam, you want a bulldozer...
 And sometimes you will need a bridge!
 The Armoured Corps memorial, complete with Centurion.
 The engine deck of the Centurion. This one was under maintenance, couldn't get a clear shot of the engine sadly...
 An M113 with .50cal turret. This particular 113 is missing it's engine block, which is why you can see the whole way through!
 Another 113, with a different turret this time. The light is doing a really good job of washing the colours out however...
 The M113 "Beast" Fire Support Vehicle. Equipped with a Saladin turret, these 113s were for fire support missions for infantry.
 Two more M113 FSV. These are equipped with Scimitar turrets, with a 30mm Raden cannon rather than the 75mm from the Saladin. These two are sitting nicely on a deployed bridge.
 A Ferret armoured car equipped with two ENTAC AT missiles. These would have been used as light scout vehicles, but once you put the ENTAC missiles on the top they become a highly mobile anti-armour weapon.
 A Taipan armoured vehicle.
 A Walker-Bulldog tank. American designed and built, used by the ARVN in Vietnam. This one has come from the Kiwis, who had a company (I think) of them post Vietnam.
 The Leopard 1A3, just looking cool. After seeing these, it is a foregone conclusion that there will be an Australian list for our 6mm Moderns game...
 Another Leopard hull, but this one has a bridge on top!
 A close up on a Leopard. There were a lot of Leopards around, it is as if the Australians had just withdrawn them from service and replaced them with the M1A1 or something!
 Not a Leopard (thanks Russell), this is a Swedish 91 Tank Destroyer- It can actually float! Some of them were given propellers to make them go even faster on the ocean! All in all, it was an underwhelming Tank Destroyer, the 90mm it is armed with is wholly insufficient in the role.
 Leopard with a Mine Plow!
 Leopard!
 An Australian LAV. an 8 wheeled armoured personnel carrier, armed with a Bushmaster chain gun. Used by multiple armies (including NZ), they are pretty well liked as far as I understand it.
Thats enough for now, it was a seriously large number of tanks!
As for the Australians, well...
An Australian LAV. an 8 wheeled armoured personnel carrier, armed with a Bushmaster chain gun. Used by multiple armies (including NZ), they are pretty well liked as far as I understand it.
Thats enough for now, it was a seriously large number of tanks!
As for the Australians, well...
 More work to do!
CP
More work to do!
CP


Subscribe to:
Comments (Atom)